
If there is one thing that ruins a powder day faster than a broken binding, it’s freezing cold sweat. We have all been there: you hike up a feature or traverse a flat spot, work up a massive sweat, and then freeze to your core the moment you sit on the chairlift. This isn’t just uncomfortable; it’s a performance killer.
Mastering your snowboard layering system is the difference between riding first chair to last call, or heading to the lodge for hot cocoa by 11 AM. It’s not about wearing the thickest coat you own; it’s about simple thermodynamics and moisture management. In this guide, we break down exactly how to layer for every condition, from deep January freeze to slushy spring laps.
Before we start, memorize this: Never wear cotton on the mountain. Cotton absorbs moisture (sweat/snow) and holds it against your skin. It loses all insulating ability when wet and chills you rapidly through evaporative cooling. Always choose wool or synthetics.
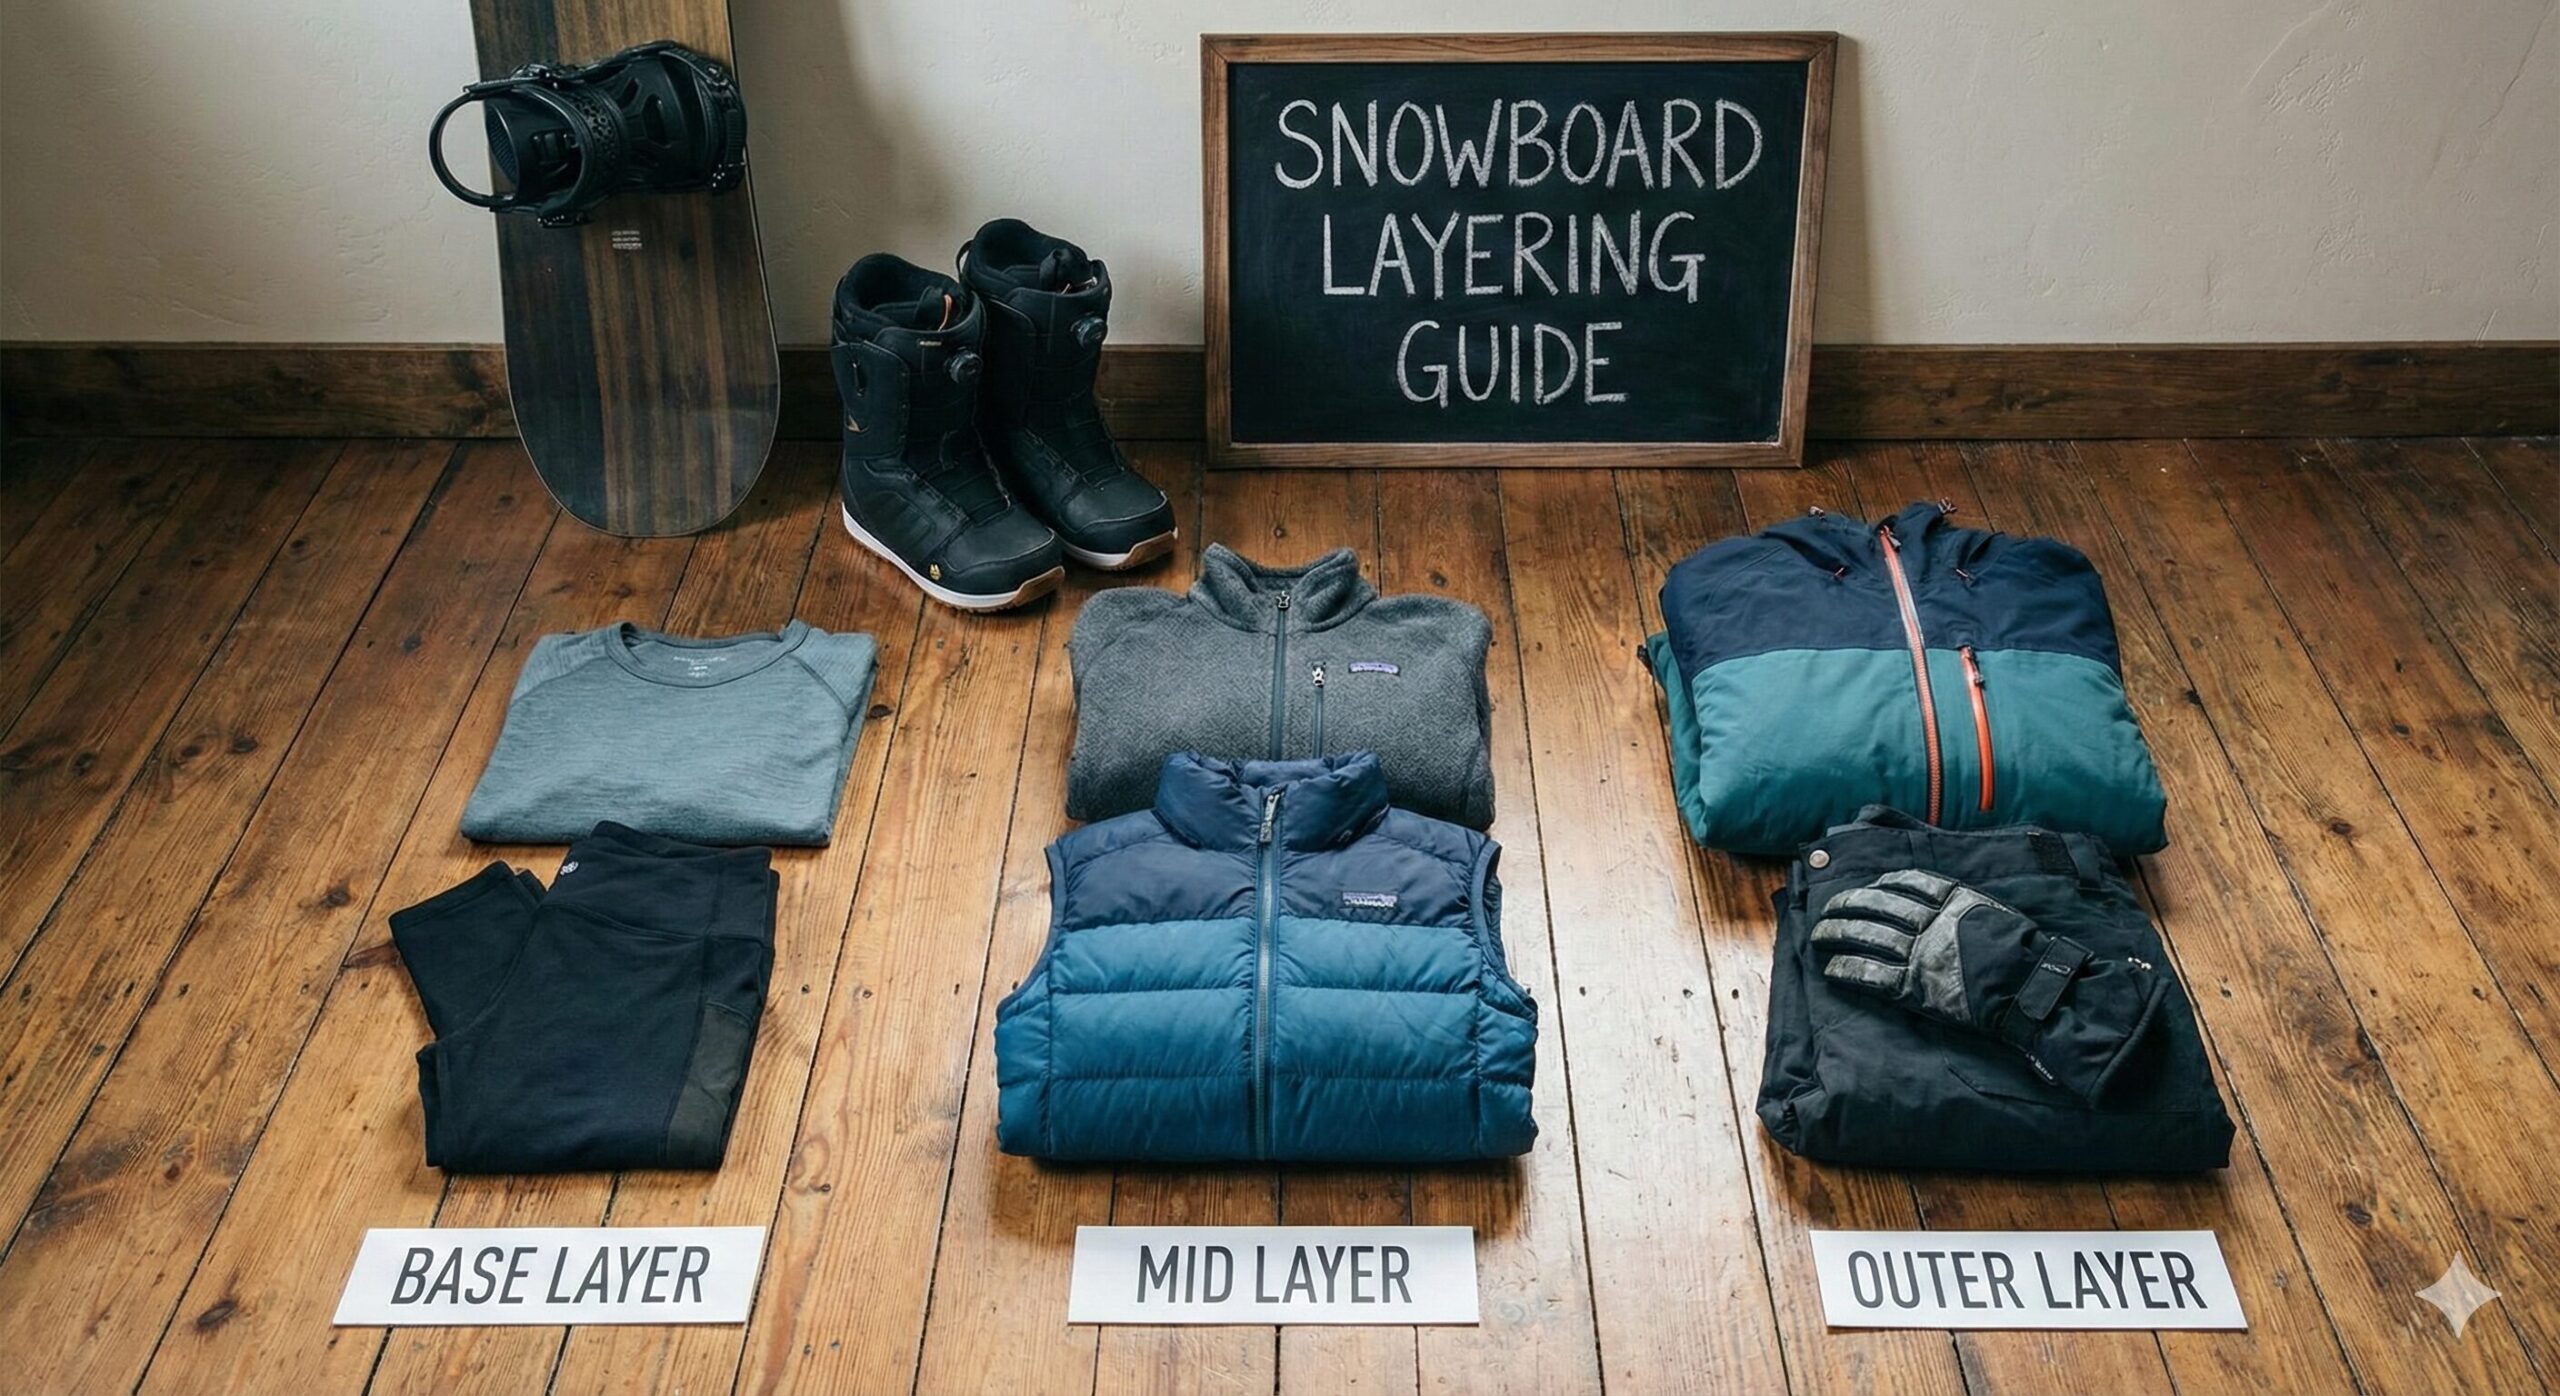
The 3-Layer System Explained
Snowboarding is a high-output activity with periods of low activity (sitting on lifts). This “stop-and-go” nature makes temperature regulation tricky. The solution is the proven 3-layer system, which allows you to add or subtract insulation as needed.
| Layer | Function | Key Requirement |
|---|---|---|
| 1. Base Layer | Moisture Wicking | Must fit tight to skin to pull sweat away. |
| 2. Mid Layer | Insulation (Warmth) | Traps body heat while letting moisture pass through. |
| 3. Outer Layer | Protection (Shell) | Blocks wind and water; allows internal vapor to escape. |
Proper layering also affects your agility. Bulky gear can limit movement, which is dangerous if you’re hitting jumps. Learn more about safety in our article on why snowboarding is dangerous and how gear mitigates risk.
Base Layers: Your Second Skin
The base layer is the most critical component because it touches your skin. Its job isn’t primarily to warm you, but to keep you dry. If your skin is wet, you will be cold, no matter how expensive your jacket is.
Top & Bottom Strategy
You need both a long-sleeve top and leggings (often called long johns). Look for “next-to-skin” fit. If it’s baggy, sweat will pool on your skin rather than wicking into the fabric.
Weight Matters
- Lightweight: For spring riding or people who run very hot.
- Midweight: The gold standard. Versatile for 90% of winter days.
- Heavyweight: Only for extreme cold (-10°F or lower) or very low-activity days.
While discussing fit, don’t ignore your feet. A common issue beginners face is foot pain due to bunching socks inside boots. Check our guide on why do my feet hurt when I snowboard to ensure your sock game is on point.

Smartwool Merino 250 Base Layer
The industry standard for a reason. 100% Merino wool naturally resists odors, regulates temperature perfectly, and feels soft against the skin.
Check Price on AmazonMid Layers: The Furnace
The mid layer is where you trap heat. Think of this as your thermostat. On a cold day, you wear a thick mid layer. On a warm day, you might skip it entirely. The goal is to create “dead air space” around your body that your core warms up.
Best Options for Mid Layers
- Fleece: Highly breathable and dries fast. Classic Polartec fleece is excellent because it lets sweat vapor pass through easily to the outer shell.
- Puffy Jackets (Down/Synthetic): The warmest option. Use a “packable” down jacket for extremely cold days. Synthetic insulation (like PrimaLoft) is better if you expect to sweat a lot, as it stays warm even when damp.
- Hoodies: A technical riding hoodie (synthetic, DWR-coated) is a favorite for park rats. Just ensure it’s not cotton!
Your mid-layer choice often depends on your budget. If you are just starting out, check our breakdown on how expensive is snowboarding to see where you can save money (hint: fleece is cheaper than down).
Patagonia R1 Fleece Pullover
The legendary grid fleece that breathes incredibly well during high exertion but traps heat when you stop moving. Essential for active riders.
Find Best DealOuter Layers: The Shield
Your jacket and pants (the shell) are your first line of defense against wind, snow, and rain. While some jackets come with insulation built-in (“insulated jackets”), a dedicated “shell” allows for better layering versatility.
Waterproofing vs. Breathability
You will see numbers like 10k/10k or 20k/20k on gear tags.
The first number (Waterproofing): How much water the fabric can withstand before leaking. 10k is minimum; 20k+ (Gore-Tex) is best for wet snow.
The second number (Breathability): How much sweat vapor can escape. If this is low, you will get wet from the inside out.
Bibs vs. Pants
For deep powder, bibs are superior as they prevent snow from getting down your pants when you crash. However, pants are easier for bathroom breaks.
Choosing between bibs and pants is a personal preference, much like the debate in our guide: Skiing Bibs vs Pants: Which is Better?.

Burton [ak] GORE-TEX Cyclic Jacket
The gold standard for shells. Fully taped seams, highly breathable Gore-Tex fabric, and designed specifically for snowboard movement.
See Colors & SizesMaterials: Merino vs. Synthetic
When buying layers, look at the tag. Here is the showdown:
Merino Wool
Pros: Naturally anti-microbial (doesn’t stink after 3 days), regulates temperature even when wet, very soft.
Cons: Expensive, can be less durable than nylon.
Synthetics (Polyester/Nylon/Spandex)
Pros: Cheaper, wicks moisture faster than wool, very durable, stretchy.
Cons: Gets smelly very fast (“perma-stink”), feels colder when wet.
Pro Tip: A blend is often the best of both worlds. Look for layers that are 50% Merino / 50% Polyester.
Layering by Temperature Scenarios
Deep Winter (0°F to 15°F / -18°C to -9°C)
- Base: Midweight to Heavyweight Merino.
- Mid: Puffy Down Jacket or thick Fleece.
- Outer: Insulated Shell or 3L Gore-Tex Shell (with vents closed).
- Extras: Balaclava, Mittens with liners.
Typical Winter Day (20°F to 32°F / -6°C to 0°C)
- Base: Midweight Synthetic or Wool.
- Mid: Fleece Vest or lightweight Fleece pullover.
- Outer: Standard Shell.
- Extras: Neck gaiter.
Spring Slush (35°F to 50°F / 2°C to 10°C)
- Base: Lightweight synthetic tee.
- Mid: None (or a flannel shirt for style).
- Outer: Softshell jacket or just a Hoodie (DWR treated).
- Extras: Sunglasses, sunscreen.
Frequently Asked Questions
Technically yes, but it is not recommended. Cotton sweatpants will get wet from sweat or snow and become heavy, cold, and uncomfortable. Use proper synthetic long underwear instead.
No! Never tuck anything into your snowboard boots except your socks. Tucking leggings into boots creates pressure points that can cut off circulation, causing cold feet and pain.
Start with three: a base layer, a mid-layer, and a shell. This gives you the flexibility to remove the mid-layer if you get too hot. It is always better to be slightly overdressed and shed a layer than to be freezing with no options.
A shell has no internal padding/insulation; it only blocks wind and water. An insulated jacket has built-in synthetic or down filling. Shells are more versatile because you can customize the warmth underneath.
Synthetic insulation is generally better for active riding because it continues to insulate even if it gets wet from sweat or snow. Down loses its warmth when wet, though treated hydrophobic down is improving.


