
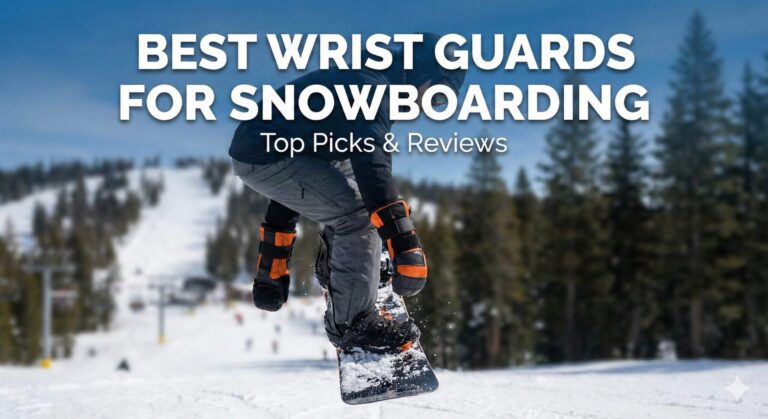
8 Best Wrist Guards for Snowboarding: The Ultimate Safety & Impact Guide
🚀 Key Highlights
- Injury Reduction: Wrist guards can reduce the risk of fractures by up to 50% for beginners.
- The FOOSH Rule: Most breaks happen due to “Fall On Outstretched Hand” – learning to roll is as vital as gear.
- Integrated Tech: 2026 gear focuses on BioMex and D3O tech built directly into mittens.
- Sizing Matters: Standalone guards often require sizing up your gloves by one full size.
Best Overall (Stealth): Burton Impact Wrist Guard – Fits seamlessly under most gloves and offers flexible protection.
Best Heavy-Duty: Demon Flexmeter Double Sided – Medical-grade protection with D3O foam for high-impact falls.
Best Integrated: Level Fly Mitts – The BioMex system is built directly into the glove for zero bulk issues.
Why You Need Wrist Guards: The Anatomy of an Impact
⚠️ The Colles’ Fracture
A typical wrist guard functions like a splint. When you fall, the energy is transferred from your palm up your forearm, bypassing the delicate carpal bones and the distal radius. Without a guard, that energy snaps the radius bone backward—a classic Colles’ fracture that can end your season instantly.
The science of snowboarding falls is rooted in torque and leverage. When your edge catches, your board stops, but your center of mass continues forward at 15-25 mph. Your brain triggers a reflexive survival response: extend the arms. When your palm hits the hardpack, it creates a point of impact that travels through the scaphoid and lunate bones. Without a guard to bridge the gap between the palm and the forearm, the wrist joint takes 100% of the force. A high-quality guard acts as a bridge, distributing that energy across the larger, stronger radius and ulna bones of the forearm.
Furthermore, modern protection isn’t just about hard plastic. We now see the use of “non-Newtonian” materials like D3O. These materials are soft and pliable during normal movement but molecules lock together instantly upon impact to absorb energy. This is a game-changer for riders who previously hated the “robotic” feel of old-school guards. Wearing protection doesn’t make you a beginner; it makes you smart. It allows you to ride with confidence, knowing that a simple slip won’t result in surgery. Just like wearing impact shorts for your tailbone or a helmet for your head, wrist guards are essential PPE.
Understanding Wrist Guard Technology: Materials Matter
D3O
Impact Absorption: 95%
Flexibility: Excellent
Best For: Park riders, freestyle
Hard Plastic
Impact Absorption: 90%
Flexibility: Poor
Best For: Beginners, high-speed carving
Foam/Gel
Impact Absorption: 70%
Flexibility: Very Good
Best For: Light protection, park laps
Wrist Guard Anatomy: What Makes a Great Guard?
A high-quality wrist guard consists of several key components working in harmony:
- The Dorsal Splint: The rigid piece running along the back of your hand and forearm. This prevents hyperextension and distributes impact force.
- The Palmar Support: Some guards include a palm plate to prevent the hand from bending backward and to provide a sliding surface.
- Compression Sleeve: The fabric that holds everything in place. Look for moisture-wicking materials to prevent sweat buildup.
- Adjustable Straps: Critical for achieving the perfect fit without cutting off circulation.
- Impact Foam: Layers of energy-absorbing material that cushion the blow before it reaches your bones.
Pro Tip: The Two-Finger Rule
When adjusting your wrist guards, you should be able to slide two fingers comfortably between the strap and your skin. Any tighter and you risk circulation issues; any looser and the guard won’t provide proper protection during a fall.
The Top 8 Wrist Guards for 2025/2026

1. Burton Impact Wrist Guard
The Upside: The absolute king of low-profile protection. It uses a tapered top splint that allows for enough flex to grab your board or adjust bindings without feeling restricted. Because they are so thin, they fit under 90% of standard gloves without needing to buy a new pair.
The Downside: The protection is “light.” If you are a park rider hitting massive booters, the thin splint may not prevent a fracture during a high-velocity landing.
Weight: 4.2 oz
Material: Flexible nylon splint
Certification: CE Level 1
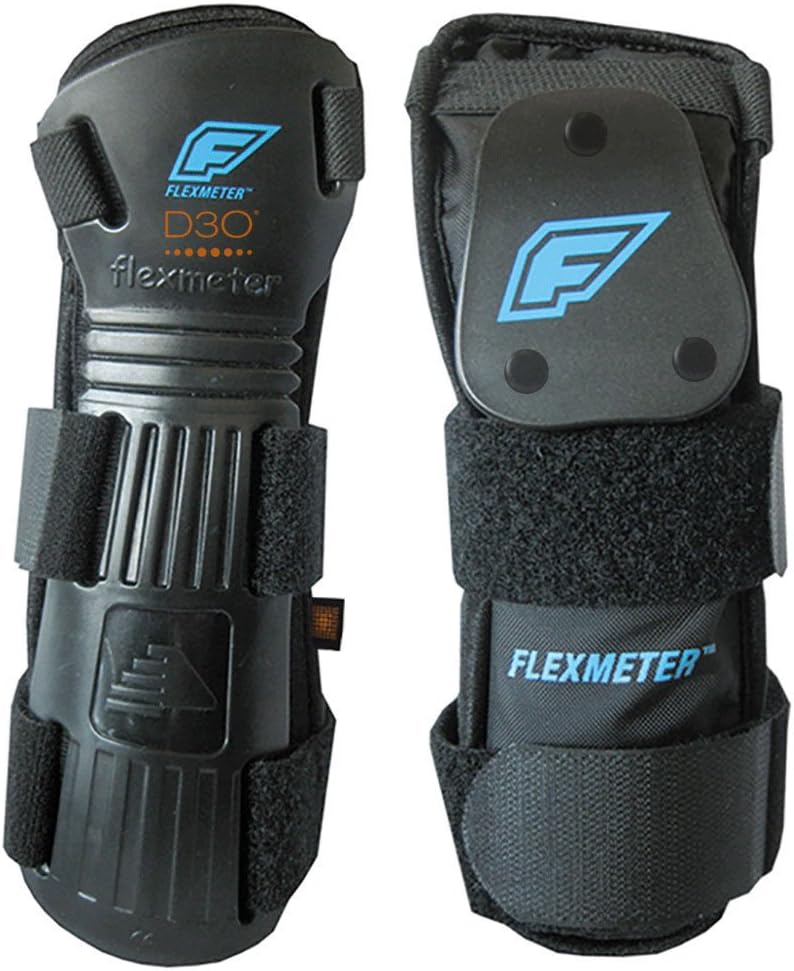
2. Demon Flexmeter Double Sided
The Upside: This is essentially a medical brace disguised as snowboard gear. Developed by orthopedic surgeons, it uses a flexible hinge that allows the wrist to function normally until it hits a dangerous angle, at which point the “Flexmeter” locks out to prevent hyperextension.
The Downside: It is massive. You will almost certainly need to buy gloves one size larger or wear these over your glove cuffs, which can look a bit bulky.
Weight: 7.8 oz
Material: Medical-grade polymer
Certification: CE Level 2

3. Dakine Wristguard Glove
The Upside: Zero hassle. You don’t have to worry about fitting a guard inside a glove because it IS the glove. The rigid nylon support is stitched into the chassis, providing a sleek look with beginner-friendly protection.
The Downside: If you tear the glove shell on a sharp edge, your protection goes with it. You also can’t remove the guard for “lazy” spring riding days.
Weight: 6.5 oz
Material: Nylon/reinforced fabric
Waterproof: Yes, with Gore-Tex liner

4. Level Fly Mitts (BioMex)
The Upside: Level uses the BioMex system, which is widely considered the gold standard for integrated protection. It keeps the wrist in an anatomically strong position. Plus, mittens are inherently warmer for those mittens vs gloves debates.
The Downside: High price point. These are an investment in your safety, but they are among the most expensive hand protection on the market.
Weight: 8.2 oz
Material: Leather/synthetic blend
Temperature Rating: -20°F to 20°F

5. Hillbilly Wrist Guard Gloves
The Upside: Built from heavy-duty goat leather. These are bulletproof. The half-finger design is perfect for those who want tactile feel or for spring conditions where you need a “work glove” vibe with extreme durability.
The Downside: Not waterproof. If you are riding in wet PNW snow, these will soak through quickly and become heavy.
Weight: 5.8 oz
Material: Goat leather
Breathability: Excellent

6. Triple Eight Undercover
The Upside: Extremely affordable. This is a classic “skate style” guard adapted for snowboarding. It uses a high-density, impact-resistant splint and a neoprene body that provides decent wrist support for under $30.
The Downside: Neoprene doesn’t breathe well. Your hands will likely be quite sweaty by lunch, and the Velcro straps can be itchy if not positioned perfectly.
Weight: 3.9 oz
Material: Neoprene/plastic
Price: $24.99

7. Seirus Jam Master Exo
The Upside: Uses a mesh exoskeleton design. This is the coolest (temperature-wise) guard on the list. It’s ideal for people who ride in warmer climates or those whose hands overheat easily.
The Downside: The mesh is more prone to tearing than leather or heavy nylon. It provides good support but lower abrasion resistance.
Weight: 4.1 oz
Material: Mesh/nylon
Ventilation: Excellent
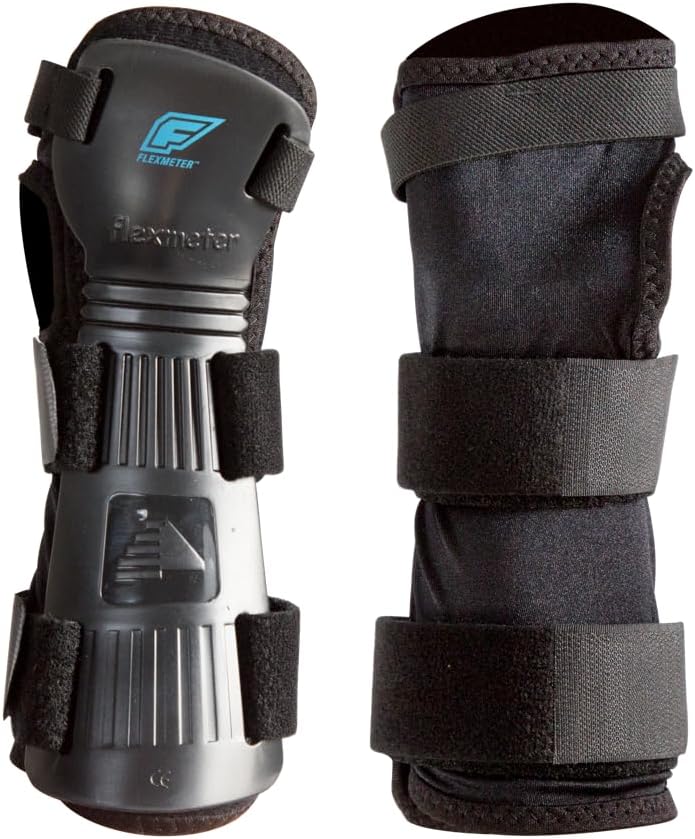
8. Demon Flexmeter Single Sided
The Upside: All the tech of the Demon Double-Sided but only on the dorsal (back) of the hand. This allows your palm to remain flat and unrestricted, making it much easier to grab your board during tricks.
The Downside: You lose the “skid plate” protection on the palm. If you land palm-down on ice, you will feel the impact much more than with a double-sided guard.
Weight: 6.2 oz
Material: Medical-grade polymer
Range of Motion: 90% unrestricted
Quick Comparison: Top Picks at a Glance
| Product | Best For | Weight | Material | Price Range |
|---|---|---|---|---|
| Burton Impact | Stealth/Everyday | 4.2 oz | Nylon | $$ |
| Demon Double | Maximum Protection | 7.8 oz | Polymer | $$$ |
| Dakine Glove | Integrated Convenience | 6.5 oz | Nylon/Fabric | $$ |
| Level Fly | Integrated Mitten | 8.2 oz | Leather | $$$$ |
| Triple Eight | Budget | 3.9 oz | Neoprene | $ |
Buying Guide: Engineering the Perfect Fit
Choosing a wrist guard involves understanding the trade-off between immobilization and dexterity. If you are learning how to carve or spending your first few days on the bunny hill, you want maximum immobilization. Your goal is to prevent the wrist from moving into a range of motion where it can snap. A rigid, double-sided guard like the Demon Flexmeter is best here.
❄️ Winter (Deep Snow)
Prioritize waterproofing and insulation. Integrated guards like Level Fly or Dakine keep the elements out while protecting you.
🌱 Spring (Slush)
Breathability is key. The Seirus Jam Master or Burton Impact with vented gloves work best.
☀️ Summer (Glacier)
Lightweight guards like Triple Eight with fingerless gloves keep you cool while protecting against hard summer snow.
🍂 Early Season
Variable conditions call for versatile guards like Demon Flexmeter that work with multiple glove options.
For park riders or advanced carvers, dexterity is more important. You need to be able to reach down and grab your board without fighting a plastic plate. In this scenario, look for guards that use D3O foam or flexible nylon splints like the Burton Impact. These allow for “natural” movement but stiffen up when an impact force is applied. Another crucial factor is Forearm Length. A guard that is too short will concentrate the force at the end of the splint, potentially causing a break higher up the arm. Look for guards that extend at least 2-3 inches past your wrist crease.
Lastly, consider the Glove Synergy. If you buy a standalone guard, take your current gloves to the shop (or order with a return policy). If the guard is too tight, it will restrict blood flow, and your fingers will freeze. Integrated systems like Level or Dakine are engineered to solve this, but they lack the modularity of separate pieces. If you’re a serious rider, having a separate guard allows you to swap between your light spring gloves and your heavy-duty winter mittens depending on the weather.
Sizing Guide: Get It Right the First Time
Measure your wrist circumference: Use a flexible tape measure around the smallest part of your wrist, just below the bone.
Small: 5.5″ – 6.5″
Medium: 6.5″ – 7.5″
Large: 7.5″ – 8.5″
X-Large: 8.5″+
Remember: When wearing under gloves, size your gloves UP by one full size to accommodate the guard.
Real Rider Experiences
“After breaking my wrist on my third day snowboarding, I was terrified to get back on the mountain. The Demon Flexmeter Double Sided gave me the confidence to progress. I’ve taken some hard falls since, and my wrists have never felt a thing. Worth every penny.”
“I’ve been teaching snowboarding for 12 years, and I require all my beginner students to wear wrist guards. The Burton Impacts are my top recommendation because they fit under gloves without changing the feel. I’ve seen hundreds of falls that would have been ER visits turn into ‘shake it off and try again’ moments.”
“As a park rat, I need dexterity for grabs but protection for when I case a jump. The Demon Single Sided gives me the best of both worlds. I can feel my board edge through my gloves, but I know I’m protected when I need it.”
Maintenance and Care: Extend the Life of Your Guards
Proper maintenance can double the lifespan of your wrist guards. Here’s how to keep them in top condition:
After Each Session:
- Remove guards from gloves to air dry completely
- Wipe down plastic components with a dry cloth
- Check straps for wear or loosening
Weekly Maintenance:
- Hand wash fabric components with mild soap and cool water
- Inspect splints for stress cracks or deformation
- Test strap tension and replace worn velcro
When to Replace:
- After a major impact that caused visible damage
- Every 2-3 seasons with regular use
- When straps no longer hold securely
- If you notice any cracks in plastic components
Advanced Techniques: Learning to Fall Properly
While wrist guards are essential, learning proper falling technique is equally important. Here’s how to minimize injury even with protection:
The Tuck and Roll
Instead of reaching out with straight arms, practice tucking your arms and rolling across your shoulder. This distributes impact across your entire upper body rather than concentrating it on your wrists.
The Slap Down
If you must fall forward, try to slap the snow with your forearms rather than your hands. This uses the larger, stronger muscles of your arms to absorb impact.
The Knee Drop
When falling backward, drop to your knees first. This reduces the distance your hands have to travel to the snow and gives you more control over the fall.
Frequently Asked Questions (FAQ)
This is a common myth. While a “radius break” can occur at the top of a guard, this is statistically much rarer than a wrist fracture. Furthermore, a clean break in the middle of the forearm bone is much easier for doctors to fix and heals much faster than a complex, multi-bone wrist joint injury. Studies show that wrist guards reduce overall injury risk by 50% without increasing forearm fracture rates.
90% of snowboard-specific guards are designed to be worn under the glove. This protects the guard from the snow and keeps the aesthetic clean. Only specialized “Exo” guards or heavy-duty skate guards should be worn over the top. If wearing under gloves, ensure your gloves are sized up appropriately to prevent circulation issues.
You can, but skate guards have a hard plastic “skid plate” on the palm designed to slide on asphalt. On icy snow, this plate can make your hands slide away from you too fast, potentially causing a shoulder dislocation. Snow-specific guards often use rubberized or foam palm pads for “grip-stop” action. If you must use skate guards, be aware of this difference and consider the increased risk.
If you feel tingling or “pins and needles” in your fingertips after 10 minutes of wearing them, they are too tight. This will lead to frostbite in cold conditions. You should be able to fit one finger between the strap and your arm. Also, your fingers should remain warm and maintain normal color throughout your riding session.
Integrated guards (built-in) are more comfortable because they are engineered as a single unit. However, standalone guards are better if you want to use different gloves for different weather conditions. Integrated guards typically cost more but offer a seamless experience, while standalone guards provide flexibility at a lower price point.
Absolutely not. If anything, the added confidence allows beginners to progress faster because they aren’t as terrified of the consequences of a fall. Advanced riders can push their limits knowing they have protection. No professional coach has ever reported guards hindering skill development.
Most plastic splints will last 2-3 seasons. However, if you have a massive “bell-ringer” crash where you land hard on the guards, inspect them for white “stress marks” or cracks. If they are cracked, replace them immediately. Fabric components typically wear out faster than plastic, so check straps and seams regularly.
Many do, especially those recovering from injury or those hitting the biggest jumps in the world. Many “Stealth” guards are hidden under gloves so you can’t see them on TV. Red Gerard, Olympic gold medalist, has been known to wear wrist guards during practice sessions.
Most under-glove guards can be washed in a mesh bag on a cold cycle. Always air dry them; the heat of a dryer can warp the plastic splints. Remove any removable splints before washing. For integrated glove guards, follow the manufacturer’s care instructions specifically.
While not legally mandatory, most instructors highly recommend them for children, as kids’ bones are still developing and their reflexes aren’t as fast to “tuck and roll.” Children’s wrist guards are specifically designed for smaller wrists and provide age-appropriate protection. Many ski schools now require them for youth programs.
Yes, but positioning is key. Most guards can be adjusted to sit above or below your watch. Some riders prefer wearing their watch on the outside of the guard for easy access, though this may affect heart rate monitoring accuracy. Consider a sports band that can accommodate the extra bulk.
Women’s specific guards typically have narrower wrist openings and shorter forearm lengths to accommodate different anatomy. However, many unisex options work well for both. The key is proper fit rather than gender designation. Always try before buying or check return policies.
Beyond the Wrists: Full Upper Body Protection
While this guide focuses on wrist protection, a comprehensive safety approach includes protecting your entire upper body:
- Elbow Guards: Essential for park riders and those prone to sliding on ice
- Shoulder Pads: Often integrated into impact vests, protect against collarbone fractures
- Back Protectors: Critical for high-speed carving and tree runs
- Chest Protection: Increasingly popular among advanced riders for rail and jump protection
Remember: Your body is your most important piece of equipment. Investing in protection is investing in your ability to ride another day.
Conclusion
Wrist guards are the cheapest insurance policy you can buy for your snowboarding career. They keep you on the mountain and out of the emergency room. Whether you choose the stealth of the Burton Impact or the fortress-like protection of the Demon Flexmeter, the best wrist guard is the one you actually wear every single day.
For 90% of riders, we recommend starting with the Burton Impact Wrist Guards. They strike the perfect balance between protection, comfort, and affordability. As you progress and your riding style becomes more aggressive, consider upgrading to the Demon Flexmeter series for maximum protection.
So gear up, check your board wax, and go shred with confidence knowing your wrists are protected from the inevitable FOOSH.
Last updated: February 2026 | Prices and availability subject to change


