
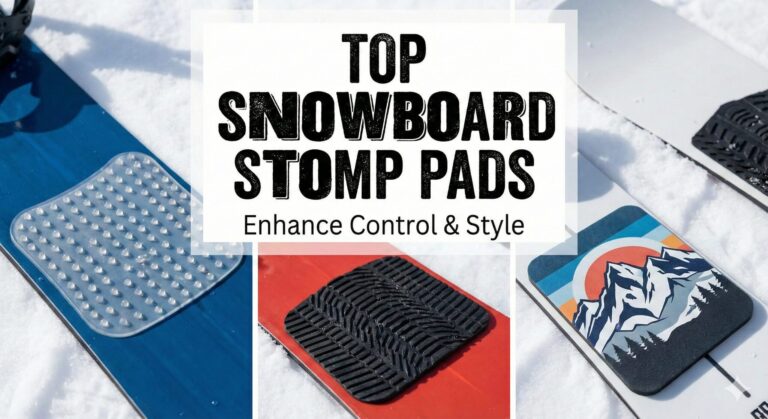
8 Best Snowboard Stomp Pads to Stop Slipping in the Lift Line
There is nothing more embarrassing—or dangerous—than sliding off the chairlift with one foot strapped in, hitting a patch of ice, and doing the splits in front of the liftie. We’ve all been there. It’s the classic “newbie slide,” and it happens because modern snowboard topsheets are designed to be glossy and slippery.
While we often obsess over big-ticket items like choosing camber vs rocker or finding the best snowboard boots, the humble stomp pad is often overlooked. Yet, this $15 accessory gives you the traction you need to skate through flats, unload from lifts safely, and save your groin muscles from disaster.
Best Overall: Dakine Modular Mat – Customizable, eco-friendly, and offers superior scraper functionality.
Best for Foam Grip: Crab Grab Mega Claws – Lightweight, classic style, and incredible traction even when packed with snow.
Best Minimalist: Dakine Pyramid Studs – Zinc alloy studs that look clean and bite into the boot sole perfectly.
Why You Need a Stomp Pad (It’s Not Just for Beginners)
Many advanced riders skip the stomp pad because they think it ruins the graphic of their board. However, riding without one is risky. Whether you are navigating the chaotic lift lines at beginner resorts or traversing flats in backcountry terrain, having a grip zone for your back foot is essential.
Think of the physics at play: a snowboard topsheet is essentially a sheet of plastic or PBT (polybutylene terephthalate). When moisture hits this surface and freezes, it creates a friction-free environment. Your boot sole, even with aggressive lugs, cannot bite into a flat, frozen surface. This leads to the “death slide” where your unstrapped foot drifts away from the board, potentially causing ACL tears or groin strains. A stomp pad introduces a textured “interlock” system, where the lugs of your boot mesh with the protrusions of the pad, creating mechanical grip where friction has failed.
A good stomp pad also serves as a scraper. When snow cakes onto the bottom of your boot, it can cause heel lift or pressure points. Scraping that ice off on your stomp pad before strapping in ensures a secure connection to your bindings. Without this, the interface between boot and binding is compromised, leading to poor energy transfer and a “mushy” feel when you’re trying to engage your edges.
The Top 8 Picks for 2024/2025

1. Dakine Modular Mat
- Molded urethane construction
- Three-piece customizable strips
- Integrated scraper ridges
The Upside: Incredible versatility. You can space the three pieces out to accommodate massive boots or keep them tight for a cleaner look. The ridges are sharp enough to clear ice but won’t ruin your pants when carrying the board.
The Downside: The adhesive surface area is split into three, meaning you have three times the chance of an edge peeling if you don’t prep the board perfectly.

2. Crab Grab Mega Claws
- Signature C-Foam material
- “Gripple” texture technology
- Oversized 2-pack design
The Upside: Foam is the only material that remains truly soft at -20°C. These act like “Velcro” for your boots. They are also incredibly lightweight, which park riders love.
The Downside: Foam is less durable than rubber. Over a 100-day season, the edges of the “claws” can start to tatter or compress.

3. Dakine Pyramid Studs
- Zinc alloy plated aluminum
- Peel-and-stick individual units
- Low profile aesthetic
The Upside: These provide the most “bite” into the sole of your boot. Because they are separate studs, you can arrange them to perfectly match the tread pattern of your specific boots.
The Downside: They provide zero scraper functionality. Also, if you lose one stud, the gap in your traction is very noticeable.

4. Burton Large Scraper Mat
- Extra-wide footprint
- High-profile scraper bar
- Clear PVD material
The Upside: This is a beast for clearing “glop” (wet, heavy snow). The central scraper bar is stiff and effective at removing ice from binding channels.
The Downside: It’s quite large and can be visually distracting on boards with busy graphics. The clear material can yellow slightly over time due to UV exposure.

5. Volcom Stone Stomp Pad
- Heavy-duty rubberized polymer
- Iconic branding
- Multi-directional grip lugs
The Upside: It’s nearly indestructible. The “Stone” shape provides grip regardless of which way your foot is angled, making it great for casual skating.
The Downside: The solid black version can absorb heat on sunny days, which might cause localized snow melting/re-freezing on the pad itself.

6. Dakine Spike Stomp Pad
- Aggressive spike height
- Clear urethane material
- Excellent drainage channels
The Upside: The spikes are incredibly sharp and tall, meaning they can find grip even through a layer of fresh powder that has settled on your board.
The Downside: They are actually quite painful if you accidentally kneel on them while adjusting your bindings. Handle with care!

7. Crab Grab Skate Rails
- Dual-rail configuration
- Flexible foam core
- Enhanced grab surface
The Upside: These aren’t just for lift lines. They make “tweaking” your grabs much easier by providing a non-slip edge for your fingers when you’re in the air.
The Downside: Because they sit near the edges, they are more susceptible to being knocked off by skis in the lift line or by clashing with other boards.

8. Dakine Circle Mat
- Low-profile dots
- Soft-touch urethane
- Value-driven 3-pack
The Upside: The most “invisible” grip option. Perfect for riders who want just a tiny bit of help without changing the flex or look of their board.
The Downside: Not suitable for high-speed skating or extremely icy conditions. It’s “assistance,” not a “locking” mechanism.
How to Install a Stomp Pad (The Professional Way)
The #1 reason stomp pads fall off is improper installation. Modern adhesives are pressure-sensitive and temperature-dependent. If you apply a pad in a cold garage and go riding an hour later, it will likely be at the bottom of the mountain by lunchtime. To ensure yours lasts the life of the board, follow this expanded protocol:
- Surface Preparation: Begin by degreasing the area. Use 70% Isopropyl alcohol. Do not use window cleaner or soapy water, as these leave a residue film. If the board is brand new, it likely has factory wax on the topsheet—this MUST be removed or the pad won’t stick for more than a day.
- The Thermal Bond: Both the board and the pad should be at room temperature (around 70°F/21°C). Use a hair dryer (not a high-heat heat gun, which can delaminate your board) to warm the topsheet until it is warm to the touch. Warm the adhesive backing of the pad simultaneously. This makes the glue “vicious” and ready to bite.
- Mechanical Compression: Once applied, you need significant pressure. The best way? Put the board on a carpeted floor, put your boots on, and stand on the stomp pad with your full body weight. Wiggle slightly to ensure the adhesive penetrates the microscopic pores of the topsheet.
- The Curing Phase: The chemical bond takes time to reach “full strength.” Keep the board inside at room temperature for a minimum of 24 hours. If you take it into the cold too early, the adhesive will “freeze” before it has finished bonding, leading to premature failure.
Buying Considerations: Deep Dive into Materials
When selecting your pad, you aren’t just choosing a shape; you’re choosing a material science solution to a friction problem. Here is what you need to know about the three main categories:
1. Urethane and Rubber
Urethane is the gold standard for durability. It is a thermoset polymer that resists abrasion and maintains its shape under pressure. Rubber pads, like the Volcom Stone, offer a slightly higher coefficient of friction when wet but can become brittle over multiple seasons of UV exposure. These are best for riders who want a “set it and forget it” solution that will last 3-5 years.
2. EVA and C-Foam
Ethylene-vinyl acetate (EVA) is essentially the same stuff used in high-end running shoe midsoles. Brands like Crab Grab have refined this into “C-Foam.” The advantage here is “porosity grip.” Even if a layer of ice forms over the top, the foam compresses under your boot, breaking the ice layer and allowing the boot lugs to sink in. They are the most comfortable underfoot but are prone to “tearing” if you frequently hit them with your metal snowboard edges while carrying your gear.
3. Aluminum and Zinc Alloys
Metal studs are the “ice tires” of the snowboarding world. Because metal is harder than ice, these studs can physically pierce the frozen layer on your board to reach the boot sole. They offer the cleanest look because you can space them out. However, be warned: they are permanent. Removing metal studs often leaves “shadowing” on the topsheet, and their aggressive nature can scratch other boards if you stack them in a roof rack or a car trunk.
Where to Place Your Stomp Pad: The Anatomy of Skating
Placement is often misunderstood. Most beginners put the pad right in the middle of the board, but this is a mistake. Here is the logic for perfect placement:
When you are “skating” (one foot in, one foot out), your center of gravity should be over your lead foot. Your back foot should rest naturally against the inside of your back binding. By placing the stomp pad flush against the back binding, you allow your leg to stay in a natural, wide stance. This increases stability. If the pad is in the middle, your legs are pinched together, making you top-heavy and prone to falling sideways. If you have a wide stance, consider a modular mat like the Dakine option so you can cover a larger area.
Frequently Asked Questions (FAQ)
Yes, but it takes patience. Use a hair dryer to soften the adhesive, then use a plastic scraper (or an old credit card) to slowly pry it up. Use “Goo Gone” or citrus cleaner to remove the remaining sticky residue. Never use a metal knife as you will slice your topsheet.
Not if you choose a transparent urethane pad or individual studs. These allow the art to show through. Over several years, the area under the pad may stay “newer” looking than the rest of the board which fades in the sun, creating a slight “ghosting” effect if you remove it later.
Technically, no—but even pros use them. It’s about safety in the lift line. One patch of ice or one person bumping into you while your foot is unstrapped can result in a season-ending injury. It’s cheap insurance.
It’s almost always the prep. If you don’t clean the factory wax off the board with alcohol, the glue is sticking to wax, not the board. When the wax gets cold, it flakes off, and the pad goes with it.
Large pads offer more scraper surface and a more consistent “target” for your foot. Small studs offer more customization and a cleaner look. For beginners, a single large pad is always recommended for the larger margin of error.
No, you shouldn’t. Since it’s a permanent adhesive, the rental shop may charge you for “damage” or a cleaning fee. If you’re renting, look for “temporary” friction decals or simply focus on keeping your boot pressed hard against the back binding.
High-quality pads like Crab Grab use “closed-cell” foam. This means the bubbles in the foam are sealed off from each other, so they don’t soak up water like a sponge. They stay light and don’t freeze into a solid block of ice.
To an extent. Pads with multi-directional spikes or ridges provide grip even if your foot is slightly twisted. Linear ridges only provide maximum grip in one direction. Look for “spiked” or “nippled” textures for the best results.
Yes, but matte boards are more porous and can be harder for adhesives to grip. You must be extra diligent with the heating and curing process (48 hours is better for matte boards).
Yes. Even with Step On bindings, you still have to skate through the lift line with one foot out. The same pads work for all binding systems.
Conclusion
A stomp pad is the cheapest insurance policy you can buy for your snowboarding safety. It saves you from embarrassed falls in the lift line and gives you the confidence to skate fast through flat sections where others are struggling. By choosing a pad that matches your local climate—be it a heavy-duty scraper for the wet Northwest or a soft foam claw for the icy East Coast—you ensure that your “connection” to the board is never compromised.
Whether you choose the utility of the Dakine Modular Mat or the style of the Crab Grab Claws, just remember to install it with heat and patience. Now that your board is prepped, make sure your edges are rust-free, grab your goggles, and hit the slopes.


